Monday, May 25, 2009

War of the Roses

Yay! I have returned from the middle ages! This weekend's camping trip was a lot of fun! For anyone not familiar with the event set up by the Barony Concordia of the Snows, it pitts the house of Lancaster versus the house of York. War points are awarded for each field won, fencing, heavy lists, archery, thrown weapons, brewing competition, seige weapons, arts and sciences and shopping (which ever side spends more money wins the point).
This weekend was packed with goings-on: His Excellency the Baron Concordia of the Snows received the Laurel (Kingdom order for the arts), three people were awarded the baronial Order of the Sapphire, five citizens were awarded the baronial Order of Friends (for service to the Barony), four dogs were awarded the Order of theFawn (for service to the Barony and one posthumously), and the Kingdom awarded the owner of the country club a baronetcy though he does not participate in the SCA for all of his help, kindness and generosity. 

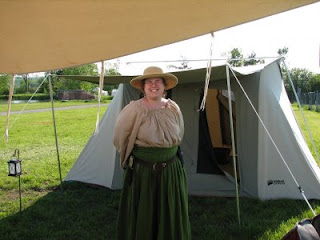
The weekend over all was quite fun and though mildly marred by occasional torrential downpours on Saturday and a air mattress with a leak on Friday evening, it went off without a hitch. I've included a photo of me in my finished Chemise and a skirt made "just because" Thursday evening prior to the weekend as well as one of our camp right after I finished setting up Friday. 

P.S. Anyone planning on going to Roses in the future that has never been be prepared to deal with lots of rocks hidden undergound when you stake in your tent. 


Tuesday, May 19, 2009

My New Tent Picture

So I promised to post a photo of my new tent. These aren't the best since I took them with my iPhone camera but here are a couple to tide you over until I take better pictures this weekend!


The "front door" and awning...


Me standing up straight with inches to spare and the black thing behind me is the gear loft that came with the tent.


Last but not least a general picture on the inside....

Sunday, May 17, 2009

Yay! Camping Season Has Begun!

For any of you who are in the SCA already you know that the camping season is off and running and how exciting that is. For those of you not in the SCA, the camping season is the high point of the year for a lot of people if not everyone in the SCA. For the most part all of the largest events happen during the spring, summer and early autumn. It's only understandable since it's the best weather for camping and camping allows for a longer event and the real immersion into SCA life. Like regular camping, this isn't for everyone though. So if it's not your thing, no worries!

Now I personally love camping! I'm going to my first camping event in many years and my first in the EK (East Kingdom in plain speak) To mark this auspicious occasion I went and splurges a bit on a new tent. My first tent was a nylon affair, a pup tent and let me tell you it was harder than hard to change into garb. Not to mention that it was hot and impossibly muggy inside on the best of days...never mind when it was hot and humid. My new tent is a beauty! It's a Kodiak canvas tent 10'x 14' with a 6'5"ceiling. It's a wall tent or as close to one as makes no difference. The great thing about canvas tents is that they are amazingingly breathable (not hot and wierdly humid like nylon thents) and they don't wick water. Go ahead and pile stuff against the wall, no water will seep in! Not to mention I can stand to get dressed which is a godsend. Now this tent is not a period pavillion...it's a modern day cabin tent. I'll take some pictures of my camp and post it here for you too see in another post sometime soon. 

In the mean time if you're going to be at War of the Roses this weekend, May 22-25th hopefully I'll see you there!

Tuesday, May 12, 2009

Project #1 ~ Chemise Update 2

So I'm running a little behind with my updates on my chemise project. I've recently thrown my ack out of whack somehow and have been forced to stay laying flat on my stomach for sometime...yay. Anyways I took this picture a couple of days ago, right after my last post really, I'm ready and able to sit long enough to explain it!

So what you're looking at is what we call a flat-felled seam. You see these on the outside seams of jeans usually. While these are definately not period there is a method to my madness. Firstly I don't own a serger to finish my raw edges. This is a great way to finish these edges and not have anything rubbing you raw at the same time. Secondly I want this piece to last a long time. The chemise is something that you wear often and will be washed more often than any other piece of garb you own. Flat-felled seams are stronger than your average seam and you'll find that they are less likely to come apart on you which save you the time that you would spend fixing them. 

For this particular piece I made it so that the seam that you see in the picture is on the inside of the garment since depending on what you're wearing you may see large amounts of the exterior seam. Hmm...at this point I should probably insert a picture of the exterior seam here...I'll make sure that I get a shot and add it soon. From experience I also will say that these don't chafe or rub as much as other types of seam finishes (including serged seams) do, especially under bodices etc. 

Friday, May 8, 2009

Project #1 ~ Chemise Update 1

So per the directions I have cut my fabric into four parts: two body pieces and two sleeves.  I sewed the corners at 8 inch corners and laid it out on my bed. This is what it looks like: 
I realize that beige muslin on a primairly beige comforter is not the most brilliant strategy but it was the only space big enough for me to lay this monstrosity out. As you can see it looks far to lareg for a body but it will gather together. The hole in the center is the neck hole and the piece hanging off the foot of the bed and its opposite are the sleeves... It's a bit awkward to work on becuase of the shape but it's really a minor problem and when I sew things up it'll be a perfect fit!! 

Side Note #1 - Featherlight Boning

In case any of you out there are thinking about using the plastic Featherlight Boning which can be found at almost any sewing shop, including Joann's Fabrics, for any corset-type project my advice is this: don't. The only time that this stuff works for corsets or bodices is if you are without any curves whatsoever. Since most women today, myself included, don't fall into this category we have to look at other options. Just for laughs I will post a photo of my bodice with featherlight boning after one day of wear here: 


You can see that the plastic has bent, clearly warping the bodice after only a short day of wear. Not to mention that it causes the front points of the bodice to roll up in a most unbecoming manner!

One popular option is Spiral Steel Boning. This is the more flexible of the two with its being flexible in all directions. However it may not be appropriate for all boning uses. It does work remarkably well for those situations when boning has to follow along a curve. It's also the more comfortable of the two for long periods of wear. 

The other option is White Steel or Sprung Steel Boning. This is more rigid than the previous option and doesn't give so easily on all axis. It will not bend to fit the curved seams like the first and unless you are used to it, can be uncomfortable for long periods of wear. 

I have worn garments made with both and I find that the more rigid of the two I found more comfortable. That is partially a personal preference as well. My best recommendation would be to get a set of each and find a way to try on your bodice with them. Better yet find a friend who is similar in size and body type and see if they'll let you try theirs on so you can get an idea of what they feel like!!

Project #1 ~ Chemise with Ruffle

While this is not my first project by any means it's the first I'm tracking here. Yay! Now for the monumental let down...it's a chemise. I've been dying to modify on so it has a bit of ruffle at the sleeve and neck.

The pattern I'll be using is here: http://www.reddawn.net/costume/chemise.htm
It's very simple and basic. The only difference is that instead of just foling the edges over and pasing elastic or ribbon though I'll be folding a bit more over, say one inch, and stitching two rows. The ribbon will be passed between the two rows of stitching with the top part becoming the ruffle.
So the end product should look something like this: 

I'm going to be using 5 yards of tea-dyed 100% cotton muslin. I didn't dye this myself but bought it this way thanks to Joann Fabrics for about $1.79/yard. I've washed and dried it on hot to make sure the next time I put it though as a finished garment it won't shrink on me before anything. Then I've ironed it all out to make sure when I'm cutting it will come out even. 

Right now have everything cut out and pinned together and am going to sew it today. I'll take pictures soon!

"Though this be madness, yet there is method in't." -Polonius

Lords and Ladies, I bid thee welcome to this newest venture! 

I am Peronelle De Croy of Carolingia of the East Kingdom, seamstress beyond compare and occasional musician. While I do have another "mundane" blog, I have decided that the adventures that I encounter in and revolving around the SCA deserve their own space, hence his pretty little page. In addition to my thoughts, projects and anecdotes I also will hopefully have a calender up so that if you can see where I'm going and doing...

With that introduction, I'm off! Let's see what the world has in store!